Monday, November 11, 2013

Diy desoldering station for under $70

Hello everyone,


Here are the promised build notes for my diy desoldering station.


What you will need.


From left to right


1. 6' of pex tubing 1/4" I.D., Note: I later changed this to vinyl tubing of the same dimensions
2. Optional length of wire to extend the wiring for the foot switch.
3. Foot switch.
4. Desoldering iron from Radio Shack.
5. Vacuum pump from Sparkfun.
6. 1/2" threaded PVC Sch40 end cap,
7. 1/2" threaded PVC Sch40 extender
8. Nylon Hose Barb 1/4in ID x 1/2in MIP.


Items not pictured
Quick Steel 2 part putty epoxy
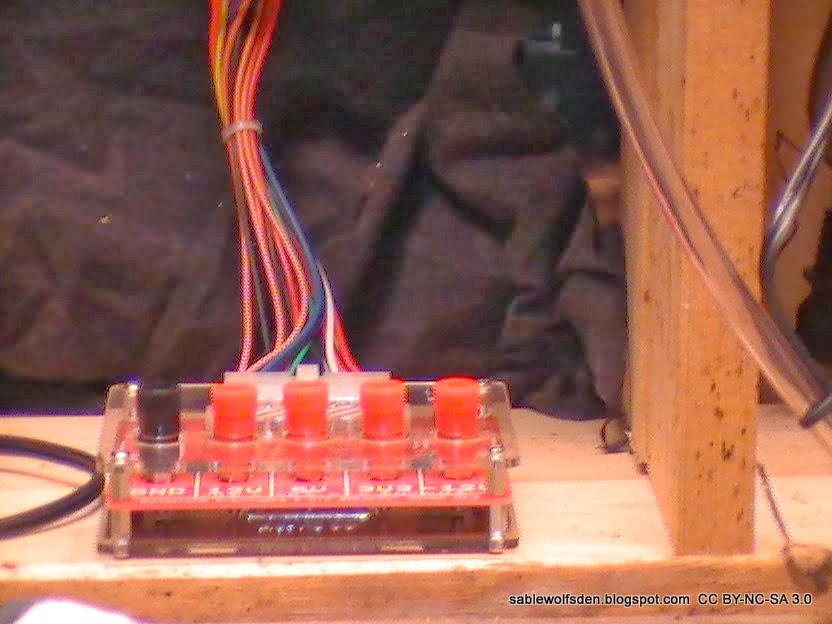
ATX Power supply
ATX break out board
Fine Steel Wool
Molex Power extension cable
New used auto fuel filter


     Getting started by building a catch for the molten solder. First you need to drill a 21/64th in. hole in the PVC end cap. This is just big enough to go over the barb on the desoldering iron.
      In the process of trying to figure out how to mount the PVC end cap on the to the desoldering iron barb. At first I thought I might be able to use the tip of the red bulb that comes with the desoldering iron, hence the next picture.
     In this attempt I used my needle nose pliers to push the tip on the bulb over the barb on the desoldering iron and this what I got.
     In testing this sealed well enough, but the tip of the bulb was not putting enough pressure against the PVC cap to inhibit movement of the catch assembly. It would just move around the barb creating what I would call a accident waiting to happen.
Catch assembly V1
     I remedy this accident waiting to happen with some Quick Steel putty epoxy. Quick Steel will work on just about everything including under water applications. But it is very important that you rough up the surfaces to be epoxied. I used some emery cloth to rough up around the barb on the desoldering iron and the whole end of the PVC cap to ensure good adhesion with the Quick Steel.
     Mixing the Quick Steel is easy, you just pull or cut the amount you want to use and knead it thoroughly for about a minute or two. Then apply and shape to your desire then let it cure for about an hour. This is what the catch V2 looks like after curing for an hour.


    As a side note Quick Steel can be smoothed while applying with a wet finger, it can also be sanded after curing..


Now that I have the catch built, I am going to put some fine steel wool inside to act as a filter for the molten solder. If you look at steel wool closely you can see that it is a width of material folded up on itself,  to get enough to fill that PVC catch camber I unfolded the steel wool as such.
    
      Then I gently push it into the catch chamber using a screwdriver tip until it reached the inside threads of the PVC extension as seen in the picture below. You definitely do not want to over pack the catch.


   This gives me enough room to thread on the nylon piece. Sorry I did not get a picture of the finished catch, but you can see it in the picture of the final product.


   Now for the wiring of the vacuum pump and the foot pedal switch. The following is more of a wiring diagram than a schematic.
   This picture did not come out as nice as I would have wished. But you can download the actual .sch file and bill of materials from my github.


I decided that the easiest way to power the system would be wire it so I could plug it into one of the branches of my ATX power supply. I took an ATX power extension cut the +12v and the ground wires, then I soldered the ground wire to one side of my 12 volt vacuum pump pictured below.


I felt the need to extend the reach of my foot petal switch. I used some left over wiring for trailer lights pictured below.


 After soldering I put heat shrink on all the terminals.
 I also wanted to be able to unplug the foot petal if I needed to move my setup. I used the bullet terminals below to accomplish this task.


I also added heat shrink to the bullet terminals to add a bit of security to the connections. A word of caution be very careful during the shrinking process as the blue plastic will shrink too (see picture)


Plug up V1 disaster


      So needless to say, I had to do this part over :).
      The foot petal has three wires on it but only the red and white need to be connected.  I connect the red wire to the +12v line from the ATX power supply, and the white back to the other side of the vacuum pump.


And yet another note of caution put the heat shrink on before crimping on your bullet connectors.


Here is a picture of the finished connectors.


     Below we have a picture of the finished wiring. At this point I want to test the wiring to make sure that I got all the connection good and solid. I shot a video of the test and it is actually pretty, funny you should check it out.
Setting up the suction hose. I decided that the pex tubing  was too stiff for the application, so I switched it out for some 1/4" ID vinyl hose pictured below with an automobile fuel filter that I am going to use between the desoldering iron and the vacuum pump to keep any bits of steel wool out of the pump should it be sucked out of the catch housing.

Automobile fuel filter connect to the vacuum pump.


The vinyl hose all in place.


Now I need to mount it some how, I decided that I would use velcro to mount the ATX power supply to the side of my bench shelf. I also drilled a hole to run a zip tie through to mount the vacuum pump (top of picture)
 I also used velcro to place my ATX break out board on the bottom shelf.
Well, that's it for the build notes, I have another video of me testing the desoldering station.
On a final note : Any comments and/or suggestions on how to improve this are welcome. My assistant Pudge, pictured below, would like to remind everyone who enjoyed this post to please  +1 us :)

Pudge 


Saturday, November 9, 2013

The Desoldering Station- Coming Soon

     Many years ago when I was in Vocational school for Advanced Electronics, we had a really nice desoldering station. I think Pace was the brand.  One day I had the fortune to accompany a friend of mine home for lunch. He was showing me his work bench, where I found that he had built his own desoldering station using the following parts:

1. A desoldering iron from Radio Shack.
2. A glass fuel filter for a tractor I am assuming, at least that is what a Google search shows.
3. A fish tank air pump.
4. A few electronics components to drive the pump.

    I am going to try and recreate Roy's desoldering station updating some of the parts and share the build with you my readers..


Sable Wolf 

Sunday, November 3, 2013

Setting up my bread board

Bread boards
I bought these SYB-120 bread boards from Ebay.


Laying out the holes for the bread boards.
I wanted to mount them on a piece of oak I have but unfortunately it was two small. In the process of stripping an old computer case, I found a solution. The top of the case was removable and with a little bit of lay out work, I think it will work really well.


Test fitting 


Friday, October 25, 2013

The Work Bench

Well my work bench is close to being done, just wanted to post what I have done so far...

I took one of the huge electrical wire spools that the electric company uses.  They give them away when they are done with them, which makes this work bench cheap.

Here is a picture of a medium sized spool.
I used a large one for the work bench.
I sorry but I did not take pictures as I was going, but the process is pretty easy.
Step 1- remove center bolts that hold the whole thing together.
Step 2-used Sawzall to cut it through the diameter
Step 3- Slap some legs on it, I used some 2 x 6's donated by my brother-in-law Mike for the back legs and two of the boards that make up the center of the spool for the front legs.


Here are some pictures of the mostly finished work bench


This last picture is the top of the work bench, it's kind of rough. I am going to purchase some tile from the local Habitat restore to put on top to smooth things out ..

Well that is about it for this post.

Stay tuned for more adventures from Sable Wolf's Den ;)

Saturday, October 5, 2013

More about this Blog

I intend to use this blog to show the building of my ultimate electronics hacker/maker space. I will be using as much open source hardware as possible.

Here is my list of projects so far (not necessarily in this order):

Workbench 
Soldering / De-soldering  station 
Tools needed for circuit evaluation
3d printer
Laser cutter/ engraver
Mp3 Juke box - got to have my tunes ;)
Weather station

It's not the full list by any means, but it's a good start..

Stay tuned for more adventures from Sable Wolf's Den ;)